Photographing movement presents photographers with opportunities to capture a sense speed and action.
Moving objects present challenges to photographers. You need to know the ins and outs of shutter speed and how to portray movement in your shots. You need to make decisions about whether to freeze the action or show some motion blur. These are technical considerations which give you different creative outcomes.
How motion appears in your image requires some knowledge of shutter speed basics. Faster shutter speeds show less blur in your shot and slower shutter speeds show more blur.
Here are 3 ways you can photograph movement.
1. Freeze the action
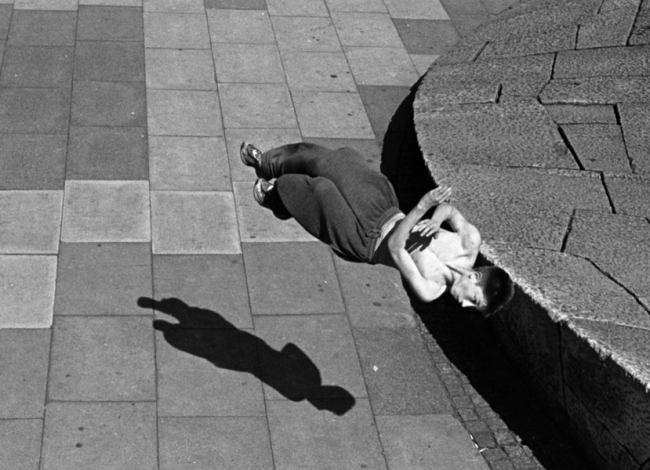
If you want to capture something that is moving very fast and make it super sharp in your shot, you’ll need to freeze the action by using a fast shutter speed. To choose a fast (shorter) shutter speed you can either used shutter priority or manual mode. Either will give you control of shutter speed.
The faster the movement in the shot, the faster the shutter speed needs to be to freeze it.
This option is good if you want to show the detail of the thing that is moving.

The photo above, of a guy jumping and twisting in the air, was taken using a shutter speed of 1/4000s which is a very fast shutter speed. He is moving very fast through the air, yet is sharp in the shot
2. Show movement as blur.
Should you wish to show a sense of movement in your image, you can do this by deliberately introducing motion blur. Anything that moves position in your frame while your shutter is open appears as blur in your final image. So, if you leave your shutter open for a longer duration you will show blur in your shot if something is moving.
If you have static objects in your shot they will also appear blurry if you hand hold your camera with a slow shutter speed due to camera shake. Therefore, when using slower shutter speeds put your camera on something steady like a tripod which means that anything that isn’t moving will remain sharp and only the things that are moving will show motion blur.

Image taken at 1/3s with the camera held steadily which shows the movement of the people walking by.
3. Panning.
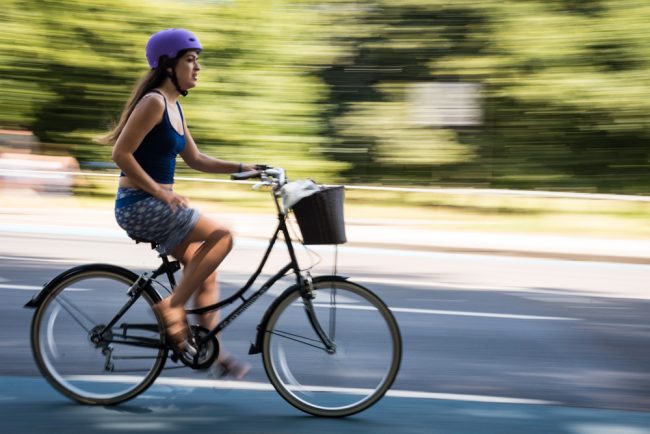
Our favourite, but the most difficult option, is to use panning. With this technique you follow the movement as it passes by and press your shutter whilst doing so. You’ll find that this technique requires some practice. By keeping the moving object in the same position in your frame you should be able to make it relatively sharp, but you will show movement in the background due to the panning action of your camera. Try using shutter priority or manual mode , with a shutter speed of 1/10 – 1/50s and moving your camera.

Image taken at 1/15s whilst panning with the cyclist.
If you want to learn more about this, check our our Beginner Photography Course.