Here it is, our mammoth list of 100 Photography Tips from the 36exp Photography School. There are photography tips here for every type of photographer from beginner to advanced, so sit back and enjoy…
Jump to:
Tips To Improve Your Photography
Beginner Photography Tips
- How to create a photo with an out of focus background.
- The difference between jpeg and raw.
- Why are some of your photos blurry?
- Take lots of photos.
- Learn some basic rules of composition.
- Learn to use shutter priority.
- Learn to use aperture priority.
- Don’t worry too much about the small stuff.
- Freeze the action.
- Show motion blur.
- Try panning.
- Know about shutter speed.
- Use aperture to influence exposure.
- You can adjust your camera’s sensitivity to light using ISO.
- Change your exposure by at least one stop to notice any significant change in the photo.
- Three clicks of the wheel adjusts exposure by one stop.
- Aperture, shutter speed and ISO combine to control exposure.
- Your camera thinks ‘correct’ exposure is a mid tone.
- Use your camera in both portrait and landscapes orientation.
- How to understand a histogram.
- In auto mode your camera makes most of the decisions.
- Manual mode gives you full control.
- Use Exposure Compensation to fine tune exposure in aperture priority, shutter priority or P modes.
- Auto ISO Can save you from blurry photos.
- Use single point autofocus to choose the exact point in the photo that will be in focus.
- Using auto area focus mode lets the camera decide what to focus on.
- Choose continuous focus for moving subjects.
- Choose single shot or AF-S if you want to lock the focus on something.
- The colour of light from various light sources is different.
- Pretend you only have 36 shots.
- Get off auto mode.
- Embark on a photography project.
- Use your legs.
- Capture a sense of scale.
- Create contrast.
- Use the negative space.
- Vary your lens choice.
- Change your angle of view.
- Think about why you’re taking each photo.
- Forget about camera equipment for a while.
- Get inspiration.
- Understand light
- Show off your photos.
- Read less internet forums.
- Stop obsessing about kit.
- Buy the best you can afford.
- Buying a new camera / lens / flash / gadget is not going to make you a better photographer.
- Shoot in raw.
- Own a 50mm prime lens.
- Don’t think that a certain mode is always the right one to use.
- Don’t be afraid to experiment.
- Have a goal
- Use neutral density (ND) filters to show movement in daylight.
- Evaluate the environment without your camera.
- Pre-visualise some shots.
- Compose and prepare.
- Wait.
- How to capture candid portraits.
- How to create light trails.
- How to shoot night time cityscapes.
- Try creating light orbs.
- Choose the right focal length
- Pay attention to the background
- Usually soft light is better for portrait photography.
- Use directional light.
- Get your exposure right.
- Try to capture some of the environment that your subject inhabits.
- How to get a natural expression out of your subject.
- Posing your subject well is essential.
- Build rapport with your subject.
- Be ready to capture candid moments.
- Focus on your subject’s eyes.
- Kit to help you take better portraits.
- Vary the background.
- Take a different viewpoint.
- Use shadows.
- Develop a style.
- Become a specialist.
- Get found on online.
- Build your profile
- Try to create a brand.
- Allow the bride and groom to enjoy the day.
- Don’t spray and pray.
- Offer something unique.
- Progress as quickly as possible.
- Don’t eat anything you don’t trust for two days before the wedding.
- Why choose a compact cameras?
- Why choose a compact system camera?
- When to choose a DSLR camera.
- How to identify Gear Acquisition Syndrome (GAS).
- Off camera flash is a great tool.
- Two lights are better than one.
- Light the back of your subject as well as the front
- You can give a black background some colour
- The combination of flash and movement is interesting
- Use fill light to lift shadows.
- Use broad lighting to make a face look flatter and wider.
- Short lighting will narrow your subject’s face.
- How to create a pure white studio background.
- How to make a white background appear grey.
- How to create a background shadow.
Set your camera to aperture priority, Choose the largest aperture you can (the smallest f number), set your lens to its longest zoom length, ensure there is distance between your subject and the background, (the further the better), get relatively close to your subject, focus, shoot.
A jpeg is a file format that can be uploaded to the internet, printed, or emailed. You can only make small changes to the way it looks, and the camera will have applied its own settings to give the image its final appearance.
A raw file is data which needs to be converted into an image. The camera has captured that needs to be converted into an image by an application such as Lightroom or Photoshop. The raw file contains more data than is represented on the back of your camera screen and you have much more flexibility with editing.
Using a shutter speed which is too slow can cause blurry photos because your camera moves in your hands whilst you are taking the photo. If you are using a slower shutter speed you should use a tripod to hold your camera steady. A rough guide is to multiply your focal length by 1.5 to calculate the minimum required shutter speed for a sharp hand held photo. e.g. if your focal length is 24mm, you can should be able to hand hold your camera and achieve a sharp photo using a shutter speed of 1/50s and faster. A 200mm lens would require a shutter speed of 1/300s or faster. This is because a longer zoom lens amplifies the movement in your hands.
You will improve as a photographer if you go out and take loads of photos. Look at the photos you take and think about what looks good and what doesn’t. Then repeat what looks good! Taking lots of phtotos also lets you find out how various settings affect your photos.
The first one to learn is the rule of thirds. Then start incorporating shapes into your photos, and diagonals and frames. By learning a some compositional techniques you’ll stop yourself from taking photos without first thinking about you are arranging elements in the photo.
Using shutter priority mode gives you control of shutter speed which means you can blur motion, or freeze action. In shutter priority mode the camera takes care of the rest of the settings to get the exposure right.
Controlling aperture enables you to change depth of field. You’ll be able to blur the background or get everything in focus.
If your primary concerns are things like whether you should use a UV filter or whether your lens is noticeably sharper at f8 vs f11 then you must already be a very accomplished photographer. When you start out things you should be concerned with are composition, focussing, shutter speed, exposure and depth of field. Don’t get bogged down in the minor details until you master the basics.
DSLRs and advanced compacts have a mode called Shutter Priority (S or Tv). Select this mode, then choose a shutter speed of 1/500s, which should be fast enough to freeze most things you see on the street.
In Shutter Priority mode, select a slower shutter speed of 1/40s and hold the camera steady. If you then take a photo of a moving subject it will show some motion blur.
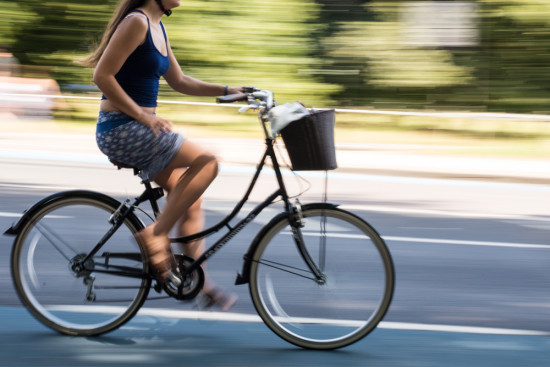
Follow a moving object with your camera as it goes by. By keeping the object at the same point in your frame as you move, will show movement in the background but make the moving object look still. Try using shutter priority mode, with a shutter speed of 1/40s. We practice this on our Beginner Photography Course.
Shutter speed refers to the length of time, in seconds or fractions of a second, that the shutter is open for when you press the shutter button. The longer the shutter is open for, the more light hits the sensor. Shutter speed also affects how motion appears in your photos. Fast shutter speed freezes the action, slower shutter speeds show motion blur.
Aperture is an opening in your lens. The size of this opening can be changed. If it is smaller it allows less light to hit the sensor, if it is larger it allows more light to hit the sensor. The smaller the F number on your camera, the larger the aperture. Yes it’s confusing.
ISO is a setting that alters the sensor’s sensitivity to light. A higher ISO number makes your sensor more sensitive to light and it therefore requires less light to make a brighter image, lower ISO numbers have the converse effect.
A common term in photography is stops. One stop means a halving or doubling of the amount of light entering the camera. Two stops means doubling and then doubling again i.e. times 4. To make a noticeable difference to exposure you need to adjust it by 1 stop, e.g. halve the size of the aperture or double the shutter speed.
In any mode where you are controlling shutter speed or aperture yourself, turn the wheel three clicks and you will halve or double the exposure e.g. 3 clicks of the wheel that controls shutter speed will take you from 1/100s to 1/50s if you go one way and 1/200s if you go the other way.
Aperture, shutter speed and ISO combine to control how bright or dark the image is (the exposure). Using different combinations can achieve the same exposure. E.g. a larger aperture allows more light to hit the sensor and therefore the shutter speed can be increased to compensate.
Your camera’s light meter ‘sees’ only tones. In auto mode it then selects a combination of aperture, shutter speed and ISO that would achieve a mid tone. If a subject is dark e.g. a black wall, you cameras meter ‘thinks’ it is a dark scene and it will expose the scene to make it a mid grey.
It sounds simple, but don’t forget to vary the way you hold your camera so you get photos in both landscape and portrait orientation.
The histogram is a graphical representation of the tones in an image split into shadows, darks, lights and highlights. You can display this when you review your images and it gives you idea of the amount of light and dark areas in an image.
In Auto mode your camera choose the setting for you to expose the scene correctly. You don’t get any input into the settings used.
In Manual mode you choose both the aperture, shutter speed and ISO (if you turn off auto ISO). The camera doesn’t make any changes to the exposure setting. Use this mode if you want to control everything yourself!
If you find that you’d like to brighten or darken the way a photo looks this can easily be achieved using exposure compensation. Look for a button on your camera which has a +/- symbol to select exposure compensation.
In Aperture Priority mode, selecting auto ISO lets your camera choose to raise the ISO instead of decreasing the shutter speed to achieve a correct exposure. This should help you avoid camera shake or unintentional image blur.
This puts more control back in your hands. You can choose to have that point in the centre of the frame or towards the edge. When you half press the shutter button you will see a single point illuminate in the viewfinder. This is the single point that you have chosen and you can move this point onto whatever you want to focus on, either by moving the camera or moving the focus point using the directional pad on the back of the camera. The camera will always focus on where you place the focus point in this mode.
Your camera might even have modes to focus on faces. When using auto area the camera will assess everything in the scene and will choose what it thinks is the most important to focus on. As you half press the shutter button dots will appear in the viewfinder to show you what the camera has chosen to focus on.
In AI Servo / AF-C autofocus mode, when you half press the shutter button, instead of locking focus, the camera will try to maintain focus on the subject even if it moves. This is a useful mode combined with auto area, if you are taking photos of subjects that are moving around a lot because you have a better chance of having your subject in focus even if they move closer or further from the camera.
In single shot (AF-S) focus mode you can lock focus by half pressing the shutter button, you will hear a beep and see a green focus confirmation dot in the viewfinder when you achieve this. You then fully press the shutter to take the photo. This is useful when you want to choose the focus point. If you are using single point autofocus you can place the focus point on your chosen subject, lock focus by half pressing the shutter button, and then you can recompose the photo to have your subject in focus but on the edge of the frame.
Fluorescent tubes emit a different colour of light than the sun, and cloudy light is different in colour than the light from a flash. The different colours of light which various light sources emit is called colour temperature, some are warmer and some are cooler. Your camera has a setting called White Balance which corrects this. Usually auto white balance does a good job.
Need more help? –>> Check out our Beginner Photography Course.
Creative Photography Tips
There was this stuff called film. You could only get 36 or 24 photos out of it. Try going out knowing you can only take 36 photos, see how this makes you slow down and carefully consider each photo before your press the shutter.
Auto mode is for when you don’t have time to think about your photos, or for when you want your camera to do the thinking. You will have much more controls over the look of your photos by controlling shutter speed, aperture and exposure yourself. Auto mode doesn’t give you control of these things, so try to
This will push you to take photos regularly, and make you look actively for photos. A theme theme may grow from one or two shots you’ve taken, or you could choose a theme to work on. You might want to work on something simple like shadows, or reflections, or you may choose a subject like people wearing red, or dogs outside shops.
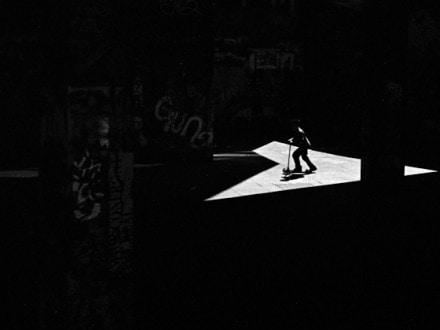
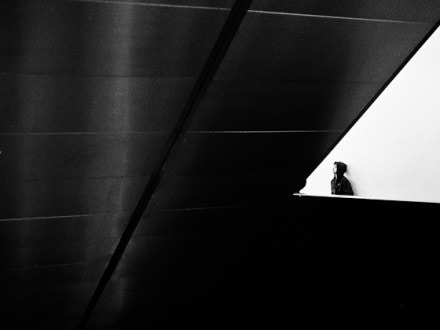
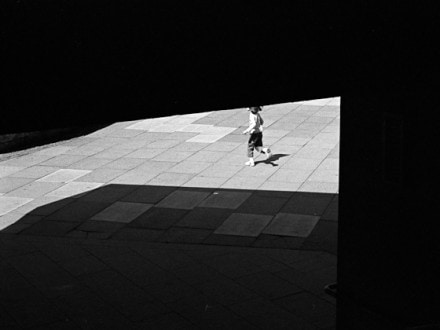
Before you take a photo spend some time walking around to see which angles look best so you get the most interesting perspective. Too often photographers plant their feet on the ground and shoot.
Some things you take photo of are huge, and others are tiny. To capture a sense of how big something is, emphasise scale by including something really small in the shot. e.g. a huge building and a single person.
Show variety and create visual interest by placing contrasting elements in an image. Black and white are obvious contrasts but you can also find more abstract contrasts such as rich and poor, old and young, ancient and modern. Try taking photos which show these.
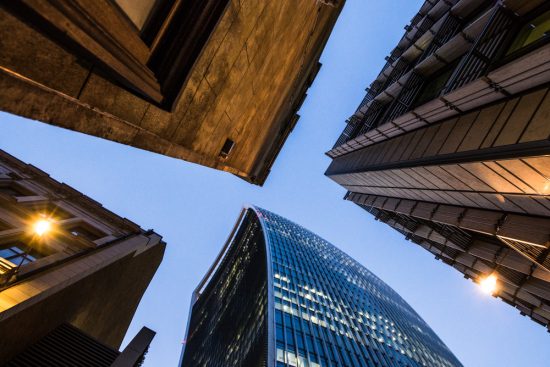
In addition to the subject you are photographing itself, consider how the negative space (most often the sky) can be used as an additional part of your shot. This is most useful when photographing buildings.
Wide angle and telephoto lenses can both be used to create different views and for variety within your set of photos. Explore the effects of different focal lengths on distance, shape scale and perspective.
Don’t take every photo at eye level. If you’re photographing animals get down to their level rather than looking down from above. You could also try to get an aerial perspective on a scene by taking a birds eye view of certain scenes. Is there a balcony you can get to?
Tips To Improve Your Photography
As a good photographer, you are not just trying to record a scene, you should always try to take a good looking photo.
The most important part of any camera is the 12 inches behind it. i.e. your head. Keep your equipment simple and learn how to use it well. Discovering how to use your camera well and how to compose great photos is going to improve your photography more than buying a new lens.
Other photographers work is great for ideas and inspiration.Flickr is a great place to start.
Find out about hard light and soft light. Hard light has contrasty shadows and can be dramatic, but soft light is good for portraits.
Get useful feedback by showing your photos to friends and family and sharing online. You’ll and a great buzz from good feedback and can improve if you get constructive criticism.
Don’t spend too much time reading posts on certain internet forums which have probably been written by people who spend more time writing dodgy internet forum posts than going out and taking photos. Internet forums can of course be good, but don’t take everything your read as the absolute truth.
Don’t buy anything else for a while. Don’t confuse your brain with lots of technical choices, use what you have and focus on taking good photos with it.
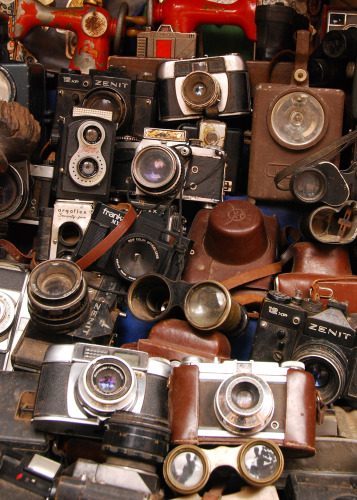
Photography is an expensive hobby, but there’s an old saying: “buy cheap and you’ll buy it twice”. This is very true in photography. Common cost saving measures that don’t ever seem to stack up are cheap tripods that are so flimsy they might as well not be used, and low quality lenses on a top of the range camera.
It may help you get a shot in certain circumstances, but it’s not going to make take better photos. If your camera is more that 5 or 6 years old you will notice a difference in performance in dynamic range and high ISO, but changing your camera doesn’t help with your composition or ability to control exposure.
Raw files give you loads of flexibility in editing. Amongst other things, you can recover lost details in shadows so that you will never really ever have a photo which is underexposed again. You will have to use an editing programme such as Lightroom, but that’s not too difficult.
For the money it’s the best return on investment you’ll get from any photography upgrade. The large aperture is great for low light and shallow depth of field, plus the image quality is noticeably better than your kit lens. If you only have your camera’s kit lens, the next thing you should buy is a 50mm f1.8 prime lens.
You’ll hear people say that manual mode is the mode you should use. That’s not right. Every mode and setting on your camera has a use depending on what you want to achieve. It might help to understand why a mode or setting gave you certain results, so try to learn about individual settings and modes so you know when to use them.
Trying different settings and noting the results is a great way to learn. Don’t be afraid to make mistakes, they may just give you some interesting images!
Setting yourself a photography goal is an excellent way to improve. They can be short term, e.g. only use aperture priority for a day and take photos with a shallow depth of field. Or they can be longer e.g. I’m going to have photo published in a magazine this year.
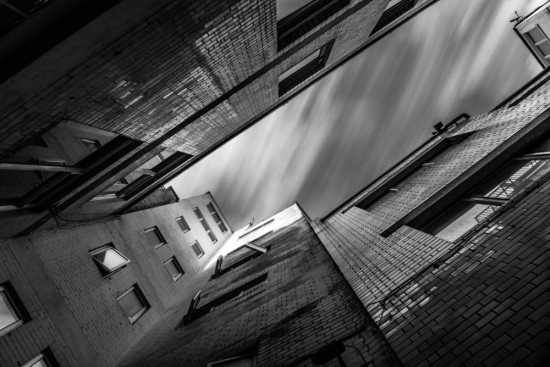
To show movement you need to use a low shutter speed. But using very slow shutter speeds (e.g. 2 seconds) in daylight will result in an overexposed photo no matter what you set your aperture and shutter speed to. ND filters block out some of the light entering your lens, and they can be use to create images with long shutter speeds in daylight. This is great for showing movement of traffic, people or water.
Street Photography Tips
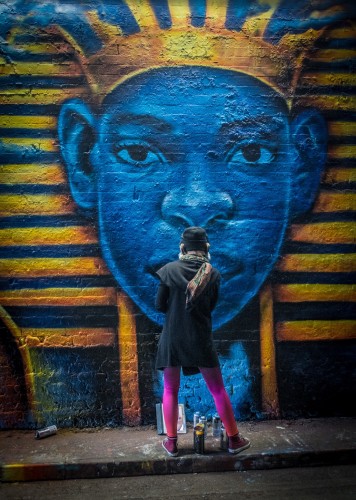
Street photo by Stephen Woollard.
In a location that you think will good for street photography take some time to evaluate the area before you start taking photos. Look for where the light falls, how it hits people, where interactions occur and how people move through the place.
Think about what would make a good street photo in your location. Is there a sign that would be a great contrast to a certain passerby, or an obstacle that people might jump over. Prepare yourself to capture these fleeting moments if they happen.
Compose your photo including the element that’s going to make your great street photo, the get your camera ready to capture the image. Your shutter speed needs to be fast enough to freeze any motion so we recommend a minimum of 1/125s, and your exposure needs to be just right to highlight your subject. Finally you should pre-focus on the spot where your subject will appear. Once that’s all done, take a few test shots to make sure it all looks right.
The best street photography happens when you wait for the moment to occur. You’ve found your interesting composition, with great light, you’ve set your exposure and got it all in focus. Now all you need to do is wait for the split second in which the guy strikes a pose in the amazing light, or the woman in the suit jumps over the puddle. These moments are gone in an instant, but if you’re prepared you’ll capture them. This is a technique we practice on our Street Photography Course.
An excellent way to combat the anxious feeling most of us feel while photographing strangers is to practice on street performers. Make a payment into their hat / tin /box then get your money’s worth by taking plenty of photos from lots of different angle and distances, and push yourself by taking some from much closer than you would normally.
Night Photography Tips
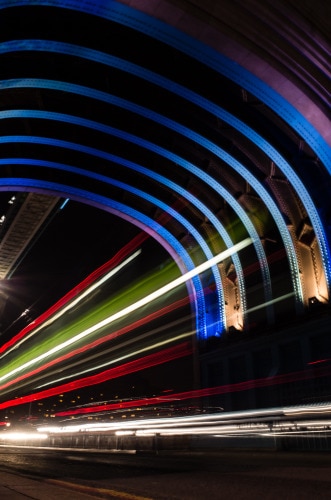
5 sec exposure at F11, ISO 100
Create light trails using the lights of passing vehicles. From a good and safe vantage point, attach your camera to your tripod. Then try the following settings – Manual moode, ISO 100, F8 and 3sec. You can experiment with different shutter speeds and apertures. This photo was created by passing traffic and our camera set manually to 5 sec, F11, ISO 100.
Capture the bright lights of the city from different angles to create nighttime cityscapes. If you can incorporate some water into your image, not only will you generate reflections, but you will also notice a smoothing effect on the water caused by the slow shutter speed. Use a tripod and try the following settings to start with – Manual mode, ISO100, 30sec and F11.
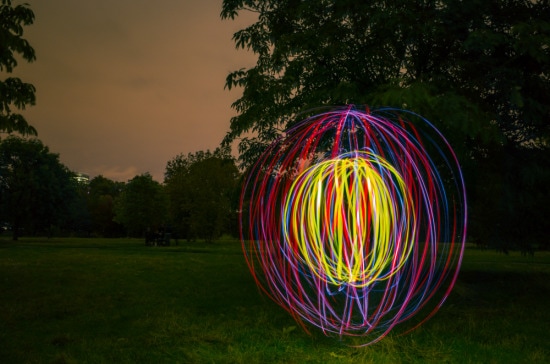
15 sec at F8, ISO 100
You can create light orbs by attaching small lights to the end of some string. To create the orb, keep your hand in one spot and begin to swing the torches, then rotate yourself through 360 degrees to create the orb effect. Set your camera to manual mode, 30sec, f11, ISO 100 and place it on a tripod. You’ll either need to work with a friend to press your shutter, or set your self timer so that the shutter fires after you start swinging. Obviously you need to do this at night time in a dark place!
Portrait Photography Tips
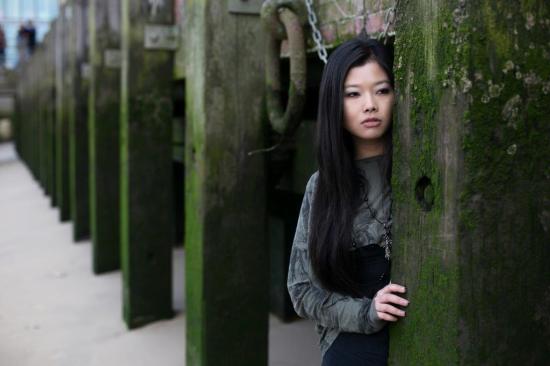
Try to use a longer focal length, i.e. stand back and zoom in, this is more flattering. Above 50mm is OK, 85mm is ideal. You should be able to do this on both compact and DSLR cameras. 50mm and 85mm prime lenses work great for portraits.
Look for a non-distracting background and blur this by using a large aperture. You’ll need your camera to be on aperture priority or manual mode. You don’t want things in the background poking out of your subject’s head.
Try to avoid strong direct sunlight as it creates harsh shadows. If you can’t avoid harsh sunlight this use your flash to lighten the shadows. In sunlight have the subject facing away from the sun and use flash to light the face. Cloudy days are good for taking photos of people as the light is nice and even. On a sunny day place your subject in the shade. Soft light (e.g. diffuse light on a cloudy day) is better than hard light (e.g. direct sunlight).
Rooms with a single window as the only light source are ideal for portraits. You can then create different photos by varying your subject’s position in relation to the light, e.g. side on to the window, facing the window and back to the window; plus you can adjust your position relative to the window, e.g. shooting with the widow behind you, or with the window at your side.
Always expose for the light on your subject’s face, even if this means the background will be over-exposed or under-exposed. As long as the part of your subjects face that is lit is correctly exposed, then the portrait is well exposed. You can allow the background to be over or under-exposed as this can have an interesting effect.
Give a sense of place to the portrait and tell the story of the person in the image and what they do. This means you don’t always have to use a classic portrait lens because a wider angle will help you show more of the environment.
It may take a while for your subject to fully relax when you are taking their photo. A good technique for getting relaxed shots is to try to make your subject forget they are having their photo taken as much as possible. You can do this by asking difficult questions which they have to think about, or telling them to do strange things such as stand on one leg.
The best pose is a position that the subject takes naturally. Watch how your subject stands when you are not taking their photo and try to get them to replicate these positions. Pretend to get something out of your bag whist chatting to your subject, and watch how they stand.
You should be chatting with your subject as soon as you meet them and throughout the shoot. Observe how your subject naturally moves and poses so you can capture them like that. Be confident and give clear direction as this will give your subject confidence too.
Always have your camera close by and ready to shoot. Actually hold it close to your face as you talk to your subject as this will get them use to it and you can quickly grab shots.
Not the nose. Not the ears.
A prime lens (85mm or 50mm are good) is great for portraits because it has a large aperture so you can isolate your subject from the background, and a white reflector to bounce some light into your subject’s face will make all the difference because it lifts the shadows under the eyes in particular.
Look for backgrounds that will actually enhance your image. Here Benjamin Youd uses a dark background to make his subject stand out. Had he used a light background the image would be completely different. You could therefore have different shots just by changing the direction you’re shooting from and changing what appears in the background.
Try looking at things differently and ask your subject to lie down, and then get down on that level yourself. Also try shooting from above for a different portrait image. You can also photograph a standing subject from a low angle to give a towering look, or have them look up at you from a seating position.
Look for things that will create interesting shadows on your subject. Try either placing something in front or your main light source to break up the light and create shadows – plants, branches, cut outs can all work. Your main light source may be natural or a flash; either can be used to create a pattern. You can also create shadows on a background by firing a flash, or shining a light, through something which breaks it up to give shadow – plants work for this, or even furniture.
Advanced Photography Tips
Try to develop your own style of photography so that people can recognise your photos even if they don’t know you took them. Accept that not everyone will like your style, but those that do will really like it.
Consider specialising in one area of photography for a while and then create an amazing portfolio around that. Example specialist areas include landscape, wedding, food, product, portrait, fashion, stock, sport, wildlife or many others. See how far you can push yourself in this area and how much knowledge you can build.
Set up a website and social media profiles for your photography, including a Facebook page, Twitter, Linkedin and Instagram. Push yourself to create great images all the time so you can post them on your site and social media profiles. Building a following takes a long time. You have to start somewhere so set targets for yourself, such as writing one blog post with an amazing image every week, or posting something great to your Facebook page every 2 days.
Enter competitions, group exhibitions and talk to people about what you do. Send your your photos to magazines and websites, give out business cards.
To differentiate yourself as a photographer in a very crowded market you need a consistent and clear identity which is strongly defined to reflect you and your photography. If you have a clear identity it will enable your potential audience to quickly see what you do and what.
Wedding Photography Tips
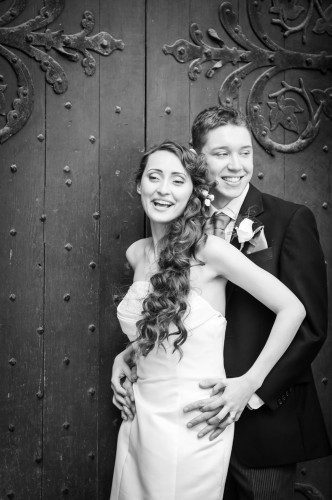
On the wedding day the bride and groom should be happily oblivious to your presence for the majority of the time. It’s their day, and they’ll know you have a job to do, but don’t be in their face or do anything that encroaches on their, or their guests, enjoyment of the wedding.
Maintaining your creative and mental focus can be extremely tough as work through a 10 hour wedding. That’s why it’s difficult, but important to consider every shot you take and have a reason for shooting. Resist the urge to snap away randomly because it will result in hundreds of average images that are of little value to you or your clients. Look for shots and uphold your principles in terms of lighting, composition and capturing the moment. You can find out more about capturing great wedding photos on our Wedding Photography Course.
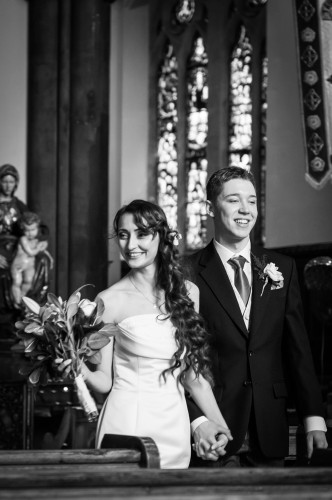
Thousands of photographers would jump at the chance of being paid to shoot a wedding. What do you have that they don’t? You need to give a bride and groom solid reasons to choose you. The best place to start is your portfolio. Think about what it is you offer and why it is unique. Understand that you can’t please everyone, but you can delight a few.
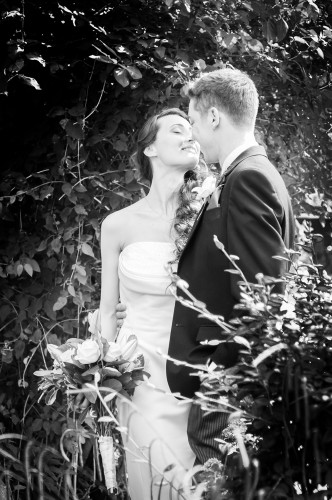
If you want to shoot high-end clients, you’ll need to display a portfolio of stunning images taken at amazing venues. Jump at any chance to second shoot at attractive venues and seek out friends and family who may be getting married there. Be very selective about the images you choose for your portfolio. Avoid the temptation to offer cheap pricing. It will attract bargain hunters who don’t value your time and skill and you’ll shoot weddings that won’t give the right impression in your portfolio.
If you’re booked to shoot the most important day of someone’s life you have to show up no matter what. In the run up to the wedding avoid any situation that risks your appearance. Don’t eat anything even slightly dodgy, don’t plan a night out the day before and don’t play in a rugby match. Your reputation and the bride and groom’s day will both be spoilt by your absence. Check your route to the venue, factor in a traffic jam and a flat tyre, and get there early.
[mc4wp_form id=”6918″]
Tips For Choosing Photography Equipment
Compact Cameras![]() range from simple point and shoot, to cameras which give you a lot of control over the camera settings e.g. aperture and shutter speed. Point and shoot is fine if you want to hand control over to the camera and can live with the limitations of the images produced by their lenses and generally small sensors. They are small and convenient. More advanced compacts allow you to access the full range of camera controls, have good image quality, and are small in size. You can’t change the lenses on them, and you may find access to the controls fiddly. But if you’re after a small package, they are a good choice.
range from simple point and shoot, to cameras which give you a lot of control over the camera settings e.g. aperture and shutter speed. Point and shoot is fine if you want to hand control over to the camera and can live with the limitations of the images produced by their lenses and generally small sensors. They are small and convenient. More advanced compacts allow you to access the full range of camera controls, have good image quality, and are small in size. You can’t change the lenses on them, and you may find access to the controls fiddly. But if you’re after a small package, they are a good choice.
Compact System, Micro Four Thirds or Mirrorless Cameras![]() offer interchangeable lenses, excellent image quality and a good level of control. They can compete with DSLRs and are a good choice if you’re looking for something smaller. You may be limited by lens choice, although adapters are available for many lenses to fit on these cameras.
offer interchangeable lenses, excellent image quality and a good level of control. They can compete with DSLRs and are a good choice if you’re looking for something smaller. You may be limited by lens choice, although adapters are available for many lenses to fit on these cameras.
Digital SLRs![]() are still the best option for flexibility, control, image quality and for growing with you. The range of lenses, accessories and features on these cameras is the reason to buy into this system. They may not be the smallest, but access to all of the controls is quick and easy, and if you’re serious about your photography buying the best DSLR you can afford is a good choice. They have excellent viewfinders which will assist your composition, battery life is good, and most brands will support a huge range of lenses and accessories enabling you to add to your system as your skills develop.
are still the best option for flexibility, control, image quality and for growing with you. The range of lenses, accessories and features on these cameras is the reason to buy into this system. They may not be the smallest, but access to all of the controls is quick and easy, and if you’re serious about your photography buying the best DSLR you can afford is a good choice. They have excellent viewfinders which will assist your composition, battery life is good, and most brands will support a huge range of lenses and accessories enabling you to add to your system as your skills develop.
GAS can strike any one of us at any time. One of the tutors here at 36exp suffers from it badly. It can be incapacitating, leading to creative constipation, pink eye, night sweats, angry outbursts, skewed vision and relationship breakdown. Once you have GAS it is like a rolling snowball of more GAS; each new acquisition provides temporary GAS relief, but the next acquisition has to be bigger, more advanced, costlier, more specific and newer. If you think you have GAS, click here to book an emergency place on our GAS workshop.
Lighting Tips
One of the advantages of using flash when shooting on location is that they are small and portable, yet powerful enough to light a good portrait. Being small and portable means we can take them to some interesting locations without having to lug around lots of heavy and expensive lighting gear. Learn about using your flash on our Flash Photography Workshop.
This image by shows what can be achieved with two flashes and some good technique. The main light is on a light stand and fired though an umbrella to light our model’s face. The second light is on a small light stand, hidden behind the model and pointing directly at the brick wall. This second light brings out more detail in the wall and adds interest and depth.
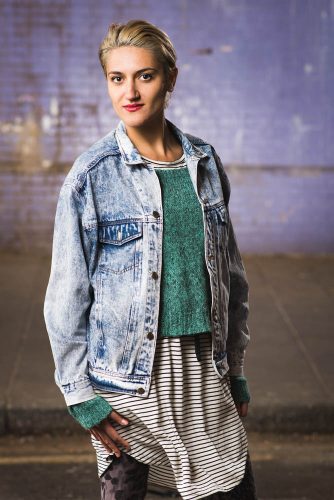
Lighting the back of your subject is nearly as important as lighting the front. It’s obviously important that your subject is lit so that you can see who it is in the photo, but the back of your subject can do a number of useful things including separating your subject from the background, enhancing the shape of your subject, or highlighting their hair or jawline. This is usually called a hair or rim light.
It sounds counter-intuitive, but you can light a black background and give it some colour. Place a coloured gel on the background light and see what happens.
Combine a slow shutter speed with flash to create a photo which has both movement and sharpness. First set the camera to manual mode or shutter priority with a shutter speed of 1/3 sec. You’re best off working in an environments that’s dimly lit such as under a bridge or at dusk otherwise the whole photo will be overexposed. Then add enough flash to light your subject and ask them to move.
The main light is the dominant light in the set up, but if it’s at an angle to your subject fact there will be shadow in the areas in doesn’t light. You can set up a second light, usually at a lower power, to light areas not lit by the main light. This is called a fill light.
Broad lighting means you have the main light positioned in a way that illuminates the side of the face that is turned towards the camera. It will de-emphasise facial features and is used mostly to make narrow faces seem wider. Broad lighting makes the face look wider and larger.
Short lighting is when the main light illuminates the side of the face turned away from the camera. It emphasises facial contours more than broad lighting.
To get a pure white background you need to light the background so that is approximately 1.5 stops brighter than the main light that you are using to light your subject. This causes the background to overexpose and to show as pure white in your photo. We’ll show you how to create a pure white background on our Studio Lighting Course.
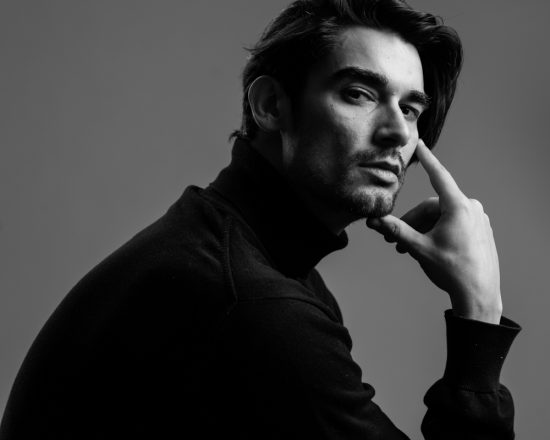
In this picture the background is completely grey, yet we are using a white background. This is very simple to achieve. Ensure you subject is position some distance from the background, say 3 metres away. When you correctly expose your subject, the background will not receive as not much light because it is further from the light. The result is a grey background. The background can be made lighter grey by moving the subject and the light closer to the background, or it can be made darker by moving everything further from the background. Simple really.
Some interest can be added to your image by creating a shadow on a white background. Have your subject stand as close to the background as possible, maybe only a few centimetres away. The subject will then cast a shadow on the background when you light them. Experiment with harder and softer lights to give a harder or softer shadow, and also try moving your subject closer and further from the background.
Brilliant photography tips! I would definitely refer to these tips for my upcoming shoots. The creative photography tips would help me in my product photography assignments.
Thanks for this great list of photography tips! I found the advice on aperture, shutter speed, and composition particularly helpful. I’m especially interested in learning more about portrait photography. Do you have any specific tips for taking portraits with natural light?”
Sure! Check out this article for portrait photography tips https://www.36exp.co.uk/portrait-photography-tips/